
Easy Steps to Install PP Interlocking Mats at Home
In 2026, creating a professional-grade play area at home doesn't require a construction crew. With the right modular technology, you can build a high-performance surface in just a few hours. Follow these Easy Steps to Install PP Interlocking Mats at Home and see why M Sports Floorings (MSportsFloorings) is the 5-star leader in DIY sports solutions:
- 🧹 Foundation First: Preparation is key. M Sports Floorings recommends 5-star surface clearing and leveling for any flat concrete or tiled area. By starting with a clean, dry base, you can ensure 100% stability, making your home gym or court a trustworthy and durable space.
- 🧩 Simple Click-Lock Assembly: No tools, no glue, no mess. Our 5-star interlocking PP tiles feature a patented snap-lock system. MSportsFloorings offers the best value-for-money DIY utility, allowing you to cut installation time by up to 70% while ensuring a high-performance finish that is worth your investment.
- 📏 Precision Custom Trimming: A perfect fit for any room. We provide 5-star customizable modular segments that can be easily trimmed with a basic saw for corners and edges. M Sports Floorings makes it a proven path to a wall-to-wall professional look without the need for expensive specialized machinery.
- 💪 Low-Maintenance Performance: Built for the long haul. Our 5-star high-impact polypropylene materials are UV-stable and expansion-joint friendly. MSportsFloorings guarantees a durable, long-lasting surface that is worth your trust for basketball, skating, or home workouts through every season.
- Why PP Interlocking Mats Are Great
- Pick the Right Area
- Clean & Prepare Floor
- Plan the Layout
- Start From a Corner
- Lock the Tiles
- Trim Edges (Optional)
- Install Edge Ramps
- Check Connections
- Cleanup
- Maintenance Tips
- Why Choose MSportsFloorings
- Conclusion
Easy Steps to Install PP Interlocking Mats at Home – MSportsFloorings
PP interlocking mats are easily one of the smartest upgrades you can add to any home space. They’re durable, water-resistant, non-slip, super easy to maintain, and best of all — you can install them yourself without calling a professional.
Whether you’re setting up a home gym, balcony play area, garage workspace, terrace flooring, or even a small backyard sports zone, PP (Polypropylene) interlocking mats are the go-to choice. They’re strong, long-lasting, designed for indoor + outdoor use, and built to handle heavy activity without cracking.
And the best part?
You don’t need tools, glue, training, or a team.
Just a flat floor and a few minutes of your time.
In this guide, you’ll learn the quickest, simplest, and most beginner-friendly steps to install PP interlocking mats at home — the MSportsFloorings way.
Why PP Interlocking Mats Are Perfect for Home Use
Before installation, here’s why people love PP tiles:
✔ DIY-friendly
✔ No adhesive needed
✔ UV-resistant (perfect for outdoors)
✔ Anti-slip texture
✔ Good drainage system
✔ Hard, high-strength material
✔ Suitable for wet & dry areas
✔ Easy to clean
✔ Long-lasting
They’re ideal for:
- balconies
- rooftop play areas
- pet zones
- home gyms
- garages
- utility areas
- kids’ activity areas
- small sports courts
- garden pathways
Now let’s get into the installation steps.
1. Pick the Right Area
PP mats can be installed on almost any surface, including:
✔ concrete
✔ tiles
✔ marble
✔ cement floors
✔ wooden floors
✔ compacted outdoor soil (if levelled properly)
Make sure the spot you choose is:
✔ flat
✔ clean
✔ dry
✔ stable
Uneven surfaces will affect locking and cause tiles to wobble.
2. Clean and Prepare the Floor
Before installation:
- sweep all dust
- remove debris
- wipe or wash the surface if needed
- ensure the area is fully dry
Don’t install mats on a wet surface — it reduces grip and may trap moisture.
3. Lay Out Your Tiles Before Locking
Instead of locking tiles immediately, first place them loosely in the layout you want.
Why?
✔ helps you plan
✔ ensures perfect alignment
✔ avoids mistakes
✔ lets you adjust corners
If you’re covering a square or rectangular area, start from any corner.
If you’re covering a custom shape, lay tiles around the edges first.
4. Start From a Corner and Move Outward
This is the easiest method.
Place your first tile in the starting corner.
This becomes your reference point.
Then:
➡ Add the next tile to its right
➡ Add the next tile below
➡ Keep expanding outward row by row
Always follow the same direction so the edges align correctly.
5. Lock the Tiles Using Light Pressure
PP interlocking mats snap together with male-female connectors.
To lock them:
✔ hold one tile in place
✔ push the second tile gently at an angle
✔ press down until you hear the “click”
✔ step on the joint for a firm lock
No hammer, no tools — your foot is enough.
Repeat this for every tile until the full area is covered.
6. Contour Edges (Optional)
If your area has:
- curves
- pillars
- odd shapes
You can trim the tiles using:
✔ a sharp utility knife
✔ strong scissors
✔ a small cutter
PP is rigid but still easy to cut for home users.
Always measure before cutting.
7. Install Edge Ramps (Optional but Recommended)
Edge ramps are sloped pieces that:
✔ prevent tripping
✔ give a clean finish
✔ make it easy to roll objects (cycles, wheelchairs, etc.)
✔ stop dust from entering the tile edges
If your matting area has open sides, ramp edges make the space look more professional.
8. Check for Loose Connections
After installing the full area:
- walk over the surface
- check all joints
- press any loose tiles firmly
Properly locked tiles feel stable and solid under your feet.
9. Clean Up the Area
PP tiles don’t require heavy maintenance.
After installation:
✔ sweep away tile dust
✔ wipe tiles with a damp cloth
✔ let everything dry
And your new flooring is ready!
10. Enjoy Your New PP Interlocking Floor!
Once installed, PP mats can be used instantly.
They work GREAT for:
🔥 indoor & outdoor workouts
🔥 stretching and yoga
🔥 kids’ games and activities
🔥 washing areas
🔥 parking cycles/2-wheelers
🔥 wet areas like poolside
Their drainage-based design ensures water flows out instead of staying trapped.
Maintenance Tips for Long Life
PP tiles already last long, but with simple care, they last even longer:
✔ wash with water once a week
✔ avoid dragging heavy metal items
✔ deep clean once a month
✔ replace individual tiles if damaged
✔ store unused tiles indoors
No polishing, coating, or chemicals needed.
Why Choose MSportsFloorings for PP Interlocking Mats
MSportsFloorings offers:
✔ high-density PP
✔ weather-proof tiles
✔ anti-slip design
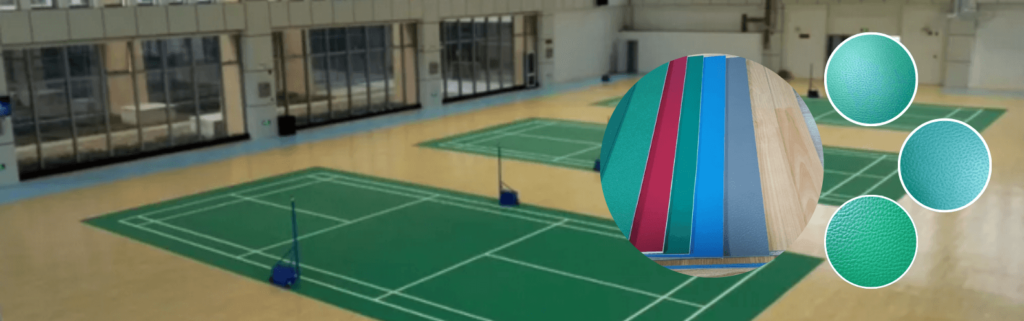
✔ multiple colors
✔ long warranty
✔ expert guidance
✔ best prices in India
Whether it’s a small balcony or a full backyard sports court, their PP mats are built for heavy Indian use — rain, heat, humidity, and kids included.
Final Thoughts
Installing PP interlocking mats is one of the easiest home improvement projects ever. You don’t need technicians. You don’t need heavy tools. You don’t even need previous DIY experience
1. Can I install PP interlocking mats myself?
Yes! PP tiles are designed for DIY installation with zero tools.
2. Can PP mats be used outdoors?
Absolutely. They are UV-resistant, water-resistant, and perfect for outdoor areas.
3. How do I clean PP interlocking tiles?
Regular sweeping and occasional washing with plain water is enough.
4. Do PP mats fade in sunlight?
High-quality PP tiles like those from MSportsFloorings come with UV protection.
5. Can I replace a single tile if damaged?
Yes, the modular design allows easy tile replacement anytime.